
From Sketch to Stitch: Mastering Pattern Making Techniques for Fashion Designers
Introduction
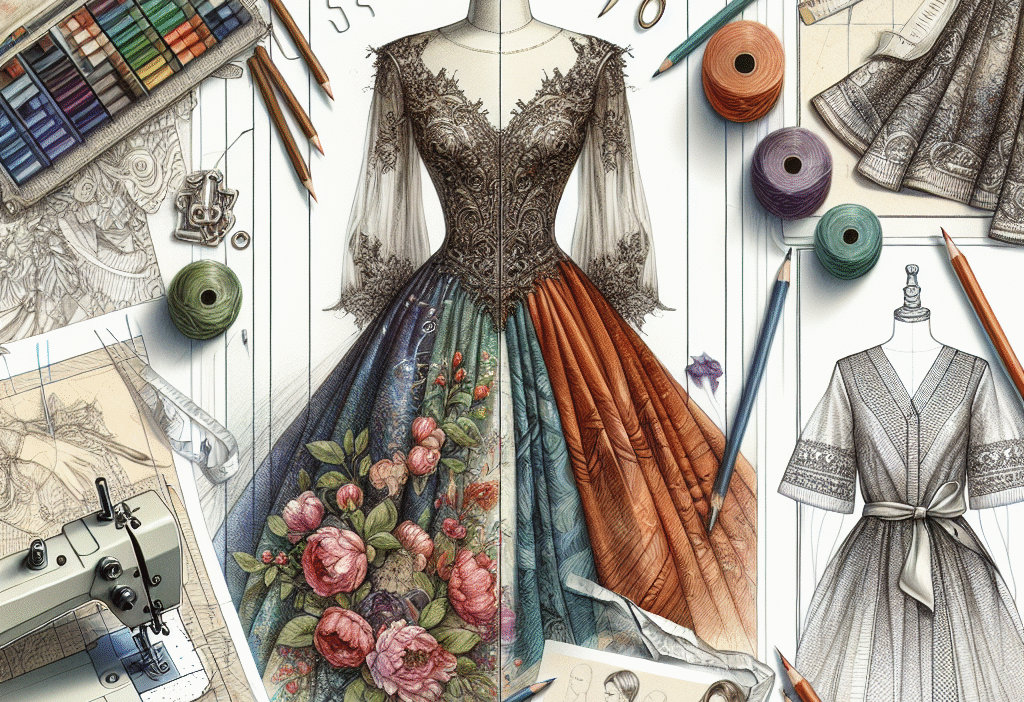
In the fast-paced world of fashion design, the journey from concept to creation is a thrilling adventure filled with creativity, innovation, and challenges. At the heart of this process lies pattern making, a critical skill that transforms two-dimensional sketches into three-dimensional garments. 🧵
Whether you’re a budding designer or a seasoned professional, mastering pattern making techniques is essential for translating your vision into wearable art. This comprehensive guide, "From Sketch to Stitch: Mastering Pattern Making Techniques for Fashion Designers," will delve deeper into the world of pattern making, providing step-by-step insights, actionable techniques, and resources to elevate your designs.
Importance of Mastering Pattern Making Techniques
Pattern making isn’t just a technical skill; it’s an art form that allows designers to breathe life into their visions. Understanding this process equips designers with the ability to:
- Improve fit and comfort
- Optimize fabric usage, minimizing waste
- Streamline the design process for efficiency
- Offer professional-quality results that resonate with your audience
With these advantages, this guide seeks to empower you to elevate your fashion design skills and take your creations from sketch to stitch like a pro.
Understanding the Basics of Pattern Making
What is Pattern Making?
Pattern making is the analytical and creative process of creating templates, or "patterns," that serve as the basis for constructing garments. These patterns guide the cutting and sewing of fabric into finished products, ensuring precise fit and style.
Types of Pattern Making
- Flat Pattern Making: This involves drafting patterns on a flat surface, typically using measurements or block patterns.
- Draping: This technique involves manipulating fabric directly on a dress form to create patterns by shaping the fabric around curves and seams.
- Pre-made Patterns: Often available in commercial packages, these are pre-designed patterns that can be adapted and altered for various designs.
Essential Tools for Pattern Making
To get started on your pattern-making journey, equipping yourself with the right tools is pivotal. Here are some essential items you’ll need:
| Tool | Purpose |
|---|---|
| Pattern Paper | High-quality paper for drafting patterns |
| Rulers and Curves | For precise measurements and curves |
| Scissors | Fabric scissors specifically for cutting fabrics |
| Pins and Weights | For securing fabric while cutting |
| Marker Pencils | For marking patterns |
Having the right tools helps ease the process and enhances accuracy, allowing you to focus on creativity. ✂️
The Process of Transforming Sketches into Patterns
Step 1: Creating Design Sketches
The first step in the pattern-making journey is to conceptualize your design through sketches. Begin by outlining the silhouette, detailing key design elements like sleeves, necklines, and hem lengths.
- Tip: Use a sketchbook dedicated to fashion design to keep your creative thoughts organized.
Step 2: Taking Accurate Measurements
Accurate measurements are crucial. Whether designing for a specific client or a broader audience, knowing the body dimensions ensures a perfect fit.
- Body Measurements: Gather size specifications such as bust, waist, hips, and inseam.
- Ease Addition: Add ease to your measurements depending on the fit type (e.g., fitted, loose, structured).
Step 3: Drafting the Pattern
Armed with your sketches and measurements, it’s time to create a flat pattern. For a basic block pattern, follow these guidelines:
- Draw a rectangular shape on your pattern paper based on your body measurements.
- Divide the rectangle into different sections (front, back, sleeves, etc.).
- Incorporate seam allowances (usually 1/4 to 1/2 inch).
Step 4: Adding Style Lines and Design Details
Once the basic shape is in place, it’s time to integrate your design features. This may include:
- Seams: Determine where the garment will be stitched together.
- Darts: Add darts to accommodate body curves.
- Hems: Plan hem lengths and finishes.
Step 5: Creating a Muslin Mock-up
Before cutting into your final fabric, it’s beneficial to create a muslin mock-up of your design. This allows you to test the fit and look of your garment without wasting expensive materials.
- Tip: Use pins to subtly adjust fit and gather feedback on the feel and look.
Step 6: Revising the Pattern
After fitting the muslin mock-up, jot down any necessary changes. Revise your pattern by altering lines, darts, or seam locations as needed.
Step 7: Cutting the Final Fabric
With a refined pattern in hand, it’s time to cut your final fabric. Take care to:
- Lay out the pattern pieces carefully to maximize fabric usage.
- Pin or use weights to prevent movement during cutting.
Step 8: Sewing the Garment
Now that fabric pieces are cut, it’s time to sew them into a complete garment! Begin by assembling from the inside (wrong sides together) and follow your sewing plan.
- Tip: Press seams as you sew for a polished finish.
Step 9: Final Adjustments and Finishing Touches
After sewing, try the garment on to check for fit again. Stay prepared to make last-minute adjustments for absolute perfection. Don’t forget to include finishing techniques like overlocking for clean edges! ✨
Visualizing the Process: Tables and Charts
Key Steps in Pattern Making
| Step | Description |
|---|---|
| Design Sketch | Initial idea capture through sketches |
| Measurements | Accurate body measurements for fit |
| Drafting Pattern | Creating a flat pattern from measurements |
| Style Lines & Details | Integrating design elements into the pattern |
| Muslin Mock-up | Constructing a test garment from muslin |
| Revise | Making necessary changes to the pattern |
| Cutting | Preparing your final fabric for production |
| Sewing | Assembling the garment through sewing techniques |
| Finishing Touches | Final adjustments and polishing the garment |
Common Pattern Making Mistakes to Avoid
| Mistake | Solution |
|---|---|
| Inaccurate Measurements | Always double-check measurements before drafting |
| Ignoring Seam Allowances | Remember to include seam allowances when drafting |
| Skipping Mock-ups | Test fit with muslin before finalizing |
| Lack of Pattern Labels | Always label your patterns for clarity |
Frequently Used Techniques in Pattern Making
Slash and Spread Method
This technique is crucial for adding fullness to patterns, like flares for skirts. Simply draw lines on your pattern and "slash" them open, allowing you to spread the sections apart for increased volume.
Contour Method
For more structured garments, contouring involves shaping the pattern pieces for a better fit around curves, such as waists and busts.
Grainline Considerations
Understanding the grain of fabric is vital in pattern making. Patterns must align with the fabric grain for optimal draping and comfort. Always mark your grainlines!
Advanced Pattern Making Techniques
Digital Pattern Making
In modern fashion design, software programs can streamline the pattern-making process. Programs like Adobe Illustrator and specialized CAD software allow designers to create digital patterns, which can then be adjusted easily and shared with manufacturers.
- Advantages: Quick alterations, precise measurements, and minimal fabric waste.
Pattern Grading
For designers looking to expand their collections, grading is the process of creating patterns in various sizes. Accurate grading ensures that proportions remain consistent across size ranges, which is vital for commercial collections.
AutoCAD for Pattern Making
AutoCAD has revolutionized pattern making by enabling designers to draft digitally with heightened accuracy. This leads to faster production processes and fewer costly errors.
Maintaining Quality in Pattern Making
Consistency
Always strive for consistency in your patterns. This includes maintaining seam allowances, grainline orientation, and fit adjustments across all sizes in a collection.
Testing
Don’t skip the testing phase. Create a sample for each new pattern to iron out any potential issues before mass production.
Conclusion
In conclusion, mastering the art of pattern making is a journey worth embarking upon in the fashion industry. With the techniques outlined in "From Sketch to Stitch: Mastering Pattern Making Techniques for Fashion Designers," you now possess the foundational tools and insights needed to turn your creative visions into tangible results.
Let each garment you create tell a story—your story. Dive in, experiment, and don’t hesitate to make mistakes along the way; that’s how growth happens. With practice, your patterns will transform from rough sketches into stunning, final garments that embody your distinct style.
Call to Action
Are you ready to take your design skills to the next level? Start today by practicing the techniques shared in this article, and soon enough, you’ll see measurable improvements in your creations.
FAQs
1. What is the difference between flat pattern making and draping?
Answer: Flat pattern making involves creating patterns on paper based on measurements, while draping involves physically manipulating fabric on a dress form to create a pattern.
2. How can I improve my pattern fitting skills?
Answer: Practice is key! Regularly draft and sew garments, and always test your patterns with a muslin mock-up to improve fit.
3. Do I need expensive tools for pattern making?
Answer: Not necessarily. Basic tools such as rulers, scissors, and pattern paper can do the job effectively. As you progress, you might invest in more specialized equipment.
4. Can I create patterns digitally?
Answer: Absolutely! Software like Adobe Illustrator and CAD programs allow you to draft, refine, and print your patterns digitally.
5. How often should I update my pattern-making techniques?
Answer: The fashion industry is ever-evolving. Stay updated on new methods and tools by taking online courses or attending workshops regularly.
By mastering the techniques from sketch to stitch, your designs can reflect your unique artistic vision. Now, go create something incredible!
Feel free to engage with related resources on myjrf.com to further enhance your learning and skill set in fashion design. Happy designing! 🎨